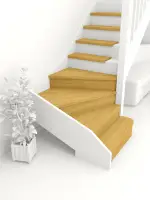
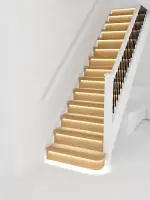
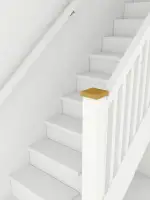
Stairway lighting kit – using LED strip.
The lighting of the stairs is not just a fancy addition. Years of experience and satisfied customers confirm its importance. The cost of installing lighting in your house or garden project is not exorbitant. It can provide the benefit of safely using stairs during the evening and night while keeping electricity bills low.
Many customers nowadays prefer modern lighting solutions, such as CoB LEDs. As a lighting manufacturer, we offer a 1-meter strip of CoB LED driver with attached sensors and power supply powered by the market leader – MEANWELL/DELTA. Recently, this device has stabilized the voltage at 12V, making the entire lighting system safe for children and adults.
CoB LED strips are made of a flexible white laminate material. Their size and ability to be cut make them suitable for installing lighting in small and hard-to-reach areas. The CoB LED lights are estimated to last between 30,000 and 50,000 hours and are available in warm white, cold white, or monochromatic colours. The self-adhesive feature of the strips makes them easy to mount on different surfaces, whether it’s a permanent connection with the groundwood, granite, or any other surface, indoors or outdoors.
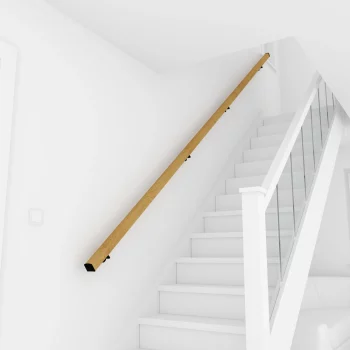
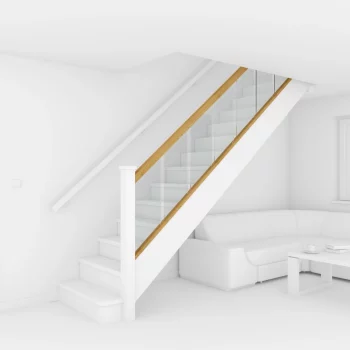
Power amplifiers are incredibly useful for enhancing the effects of light, especially when it comes to illuminating railings. Our lighting systems can be installed on both traditional and openwork steps. The final impact and attractiveness of the illumination depend on your ideas, and we provide the necessary tools to bring them to life.
IMPORTANT
When mounting the unit, be careful.
– To the appropriate wiring +12 V and-12V reverse connection may damage the processor
– When the controller is switched on, do not touch the plate on the solder side – this can lead to surges and damage to the processor
– When the controller is switched on, do not touch the wires on the backs of passive and active – it can lead to surges and damage to the processor
– control channels and outlets PD, PG, PS. Do not connect +12 V voltage – this can lead to surges and damage to the processor
———————————————————————
1. Connect the (-) led strips, bulbs, etc. to the appropriate stairway channel (1 step to channel 1, second to channel 2, etc.)
2. All (+) led strips, led light bulbs, etc. connect – then connect to (+ 12V – LED power supply)
3. Connect the 110-230V / 12V power supply to the staircase controller (make sure the -12V is connected to the -12V socket and + 12V to the + 12V socket)
4. Make the jumper on the socket described PS, then connect the power supply 230V – if you have done the installation correctly, all the lights will light up
5. Turn off the power and remove the PS jumper.
6. Connect the motion sensors – the sensors are best installed at 25-35 cm above the ground. After installation, please check the voltage coming to the sensor. It should be at least 12V, preferably 12.05V (in the case of “white” sensors, after connecting the cables, the sensor should close; if it is open, it will not work properly)
7. Program the controller as instructed without skipping any step.
Intelligent controller for stairs – Version 5-20 points of light
Specification:
Supply voltage: 8-15V DC. Typically, 12V DC.
Power consumption by the same controller: 20mA.
Power consumption by the same controller for supply voltage – 12V 0.25 W.
Current Load (Intensity): to 1A per channel (step).
Ambient temperature: 5-35 ̊C.
Description of the controller:
• Keys (DIP) “M”, “+”, “-“, “S” – keys for programming
• PS – input light is constant (after short circuit) – light all the points of light) a permanent light
• PD – sensor input short circuit (NO) up – down
• PG – sensor input – short circuit (NO) down – up
• Inputs 1 – 20 – Inputs other channels
• “-12V” – input “-” Power DC
• “12 V” – input “+” Power DC
Algorithm (the controller functions):
• Traffic control on the stairs (you go – from “up” to “down”)
• Traffic control on the stairs (you go – from “down” to “up”)
• Traffic control with mutual traffic on the stairs (one person from “up” the second person from “down”)
• Mode “step by step” or “smooth lighting.”
• Regulation lighting time of the light (from 0.25 seconds to 5 seconds)
• Regulation blanking time points of light (from 10 seconds to 3 minutes)
• Different modes of operation in standby mode
the mode “everything is off.”
the mode – the extreme points of light shine
the mode – all the points of light shine
• Regulation of the brightness of light points in standby mode
• Permanent light (with using PS)
• Supports traffic from the landing (using PS – a permanent light)
Turn on channel by channel.
They are turning off the channel by channel.
Before we reach the result, the second detector will operate in the opposite direction and encounter two effects on its path. If the result is achieved and the second detector operates, the controller will detect that a person has left the stairs, and this will signal the light to fade in the same direction as the person’s movement (i.e., if the person was on the stairs, entered and left, the light will fade in the same direction).
Programming
Entering Programming Mode:
1. Turn off the 12V DC power supply to the controller
2. Press and keep the microswitch “M”
3. Turn the power on the 12V DC controller
4. Entering the programming mode signals the LED to blink three times from 1 to 5
5. The controller goes into programming mode. The first step is to program the number of stairs (light points)
Programming the number of steps (points of light) – no lights, red LED
1. The default number is 5 points of light
2. The number of selected points of light is indicated by red LED no. 2 (how many times as red LED no two blinks – so is the set – points of light (stairs)
3. After entering the programming mode, use buttons (microswitches) “+” and “-” to select the expected number of points of light (stairs). Each press of the button causes the LED sequence to wait for it to complete before the next press of a button (DIP)
4. Press the button (microswitch) “S” to confirm the number of stairs (light points)
5. After pressing the “S”, – go into the programming mode operation (step-by-step or smooth lighting)
Programming working mode (step-by-step or smooth lighting) – lighting red LED No. 5
1. The default mode is smooth
2. Pressing the (DIP) “+” to select the mode – step by step (visual LED 1)
3. Pressing the (DIP) “-” to select the mode – smooth lighting” (visual LED 1)
4. Press button (microswitch) “S” to confirm operation
5. After pressing the “S” go into the programming mode speed light (lighting) stairs (points of light)
Programming the speed of light (lighting) stairs (of the light) –lighting red LED No. 4
1. The user has a choice of 20 times light (lighting) from 0.25 seconds to 5 seconds – pressing any key “+” or “-” to change the setting by 0.25 seconds
2. Pressing the (DIP) “+” extends the light (lighting) stairs (visual LED 1)
3. Pressing the (DIP) “-” reduces light (lighting) stairs (visual LED 1)
4. Press button (microswitch) “S” to confirm the speed of light (lighting) stairs (of the light)
5. After pressing the “S”, go into the programming mode staircase lighting time (points of light) after passing by the user
Programming the staircase lighting (light spots) after passing by the user – lighting LEDs no. 4 and 5
1. The default is 10 seconds. You can change this value from 10 seconds to 3 minutes. The signalling is by LED no. 1. Every blink is 10 seconds (you can change from 1 to 18 – blinks)
2. Pressing the (DIP) “+” increases the lighting time (lighting) steps after passing the user (visual LED 1)
3. Pressing the (DIP) “-” reduces lighting (lighting) steps after passing the user (visual LED 1)
4. Press button (microswitch) “S” to confirm the staircase lighting time (points of light) after passing by the user
5. After pressing the “S”, go into the programming – standby mode (no one moves up the stairs)
Programming the controller standby mode (no one moves up the stairs) – lighting LED no. 3
1. The controller is equipped with three modes of operation in standby mode (the default mode set “a”) (LED signalling 2)
a. not light any light points (one blink LED 1)
b. lights are on all the points of light (the power set of the light source) (two blinking LEDs No. 1)
c. lights are extreme points of light (the power set of the light source) (three LEDs blink 1)
2. Pressing the (DIP) “+” or “-” changes the standby mode
3. After pressing the “S” move on:
a. A programming mode brightness light points in standby mode (if you choose options “b” or “c”).
b. at the end of the programming, if you selected “and” – you should then finish programming by pressing (DIP) ‘M’ “. Saving to memory is signalled blink three times, all red LEDs from 1 to 5
Programming brightness light points in standby mode – lighting LEDs no. 3 and 5
1. Visualization brightness light points in standby mode is done by LED 1
2. Pressing the (DIP) “+” brightens spotlight (LED visualization No. 1)
3. Pressing the (DIP) “-” dim spotlight (LED visualization No. 1)
4. Press button (microswitch) “S” to confirm the brightness of light points in standby mode
5. A complete set of programs will be signalled by a single blink of all the red LEDs from 1 to 5
6. Save your settings and exit programming by pressing the key (DIP) “M”. Saving to memory is signalled blink three times, all red LEDs from 1 to 5
Motion Sensor – 12V/1A
Description – Application
This is the revised version:
The 12V/1A sensor, equipped with a miniature lens, is specifically designed for indoor installation. It can be used for automatic switching of lights with intelligent controllers. Its universal design (mechanical-electric) allows the sensor to function as an independent actuator connector.
Specifications
Power supply: 12V DC
Max load current: 1A
Detection angle: 20 degrees
Adjusting the backup time: Smooth adjustment – from impulse – up to 0,5-5 minutes
Detection range: Smooth adjustment – 0.4 m – up to 2m
Functions
– Control measures according to ambient light intensity
– Adjusting the on-time
– Adjusting the detection range
Setting – start – Sensor

Potentiometer – METER – sets the max distance from the sensor for motion detection
Potentiometer – TIME – set-up time relay (for controllers’ stair set at minimum)
Potentiometer – LUX – a threshold value depending on the ambient light intensity.

Motion Sensor – Miniature – 12V/15A – integrable
Description – Application
This is the revised version:
The 12V/1A sensor, equipped with a miniature lens, is specifically designed for indoor installation. It can be used for automatic switching of lights with intelligent controllers. Its universal design (mechanical-electric) allows the sensor to function as an independent actuator connector.
Specifications
Power supply: 12V DC
Max load current: 15A
Detection angle: 20 degrees
Adjusting the on-time: Smooth adjustment – from impulse – up to 0,5-5 minutes
Detection range: Smooth adjustment – 0.5 m – up to 1,5m
Functions
– Control measures according to ambient light intensity
– Adjusting the on-time
– Adjusting the detection range
Setting – start – Sensor

Install a mini sensor – connect “only” wire:
– in 1 – White
– in 2 – Brown
– in 3 – Green
Potentiometer – METER – set the (for controllers’ stair set at middle) distance from the sensor for motion detection
Potentiometer – TIME – set-up time relay (for controllers’ stair set at minimum)
– in 4 – yellow – and set potentiometer – LUX (for stair controllers’ Do not connect the wire)


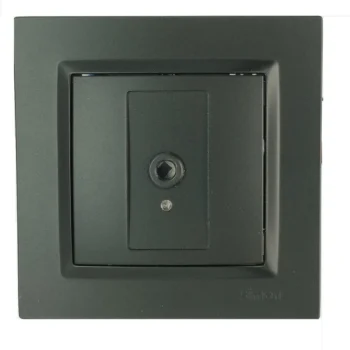


%20–%20Warm%20White&url=https://www.fiximer.co.uk/product/smart-led-stair-lighting-bundle-v5-20-connector-simon-black-warm-white/&media=https://www.fiximer.co.uk/wp-content/uploads/Smart-led-stair-lighting-bundle-v5-20-connector-simon-black-600x600.webp)
Reviews
There are no reviews yet.